

Experimental mini lemon cube pound cakes
A mash up of two different recipes

A few months ago, I listened to a podcast where guest, Christina Tosi (founder of Milk Bar), shared her baking philosophy, which absolutely stunned me. She claimed, “I definitely bake like I’m a cook at home”. Like full-on eyeballing measurements for baked goods (only in her home to be clear).
Wait WHAT!? As a new baker who’s only thought of baking as an exact science, this was 1) shocking and 2) a huge breath of fresh air. No one ever talks about baking like this!
Tosi advocates “thinking for yourself and tasting for yourself”—getting to know the whys and hows of baking “through years of asking questions and trial and error.”
So this week, I’m asking the question: what happens if you mash up two different pound cake recipes? Well, let’s find out!
Methodology
I used John Kanell’s (Preppy Kitchen) lemon pound cake recipe as the base and stole a few methods from Hanbit Cho’s recipe for the cube shape:
Kanell’s recipe: Use the base ingredients and measurements for the batter and lemon glaze.
Cho’s recipe: Use the cube silicone mold, beat the eggs separately, and douse the cake in simple syrup.
My own twist: Add vanilla extract for more flavor and double the amount of lemon zest for the batter.
📝 Quick Note: In theory, I could have used Cho’s recipe for the whole thing, but I didn’t have candied lemon peel, so this was the perfect chance to experiment.
My hypothesis: A pillowy, moist cake with a hint of bright lemon, packaged into an adorable little cube—perfect for one serving!
The Experiment
Okay, let’s get into what happened in the actual bake!
Part 1: Making the Batter
I won’t bore you with all the details since it’s pretty straightforward:
Cream the butter until fluffy: This part creates air bubbles, which makes the cake rise. So it’s important to cream until light and soft.
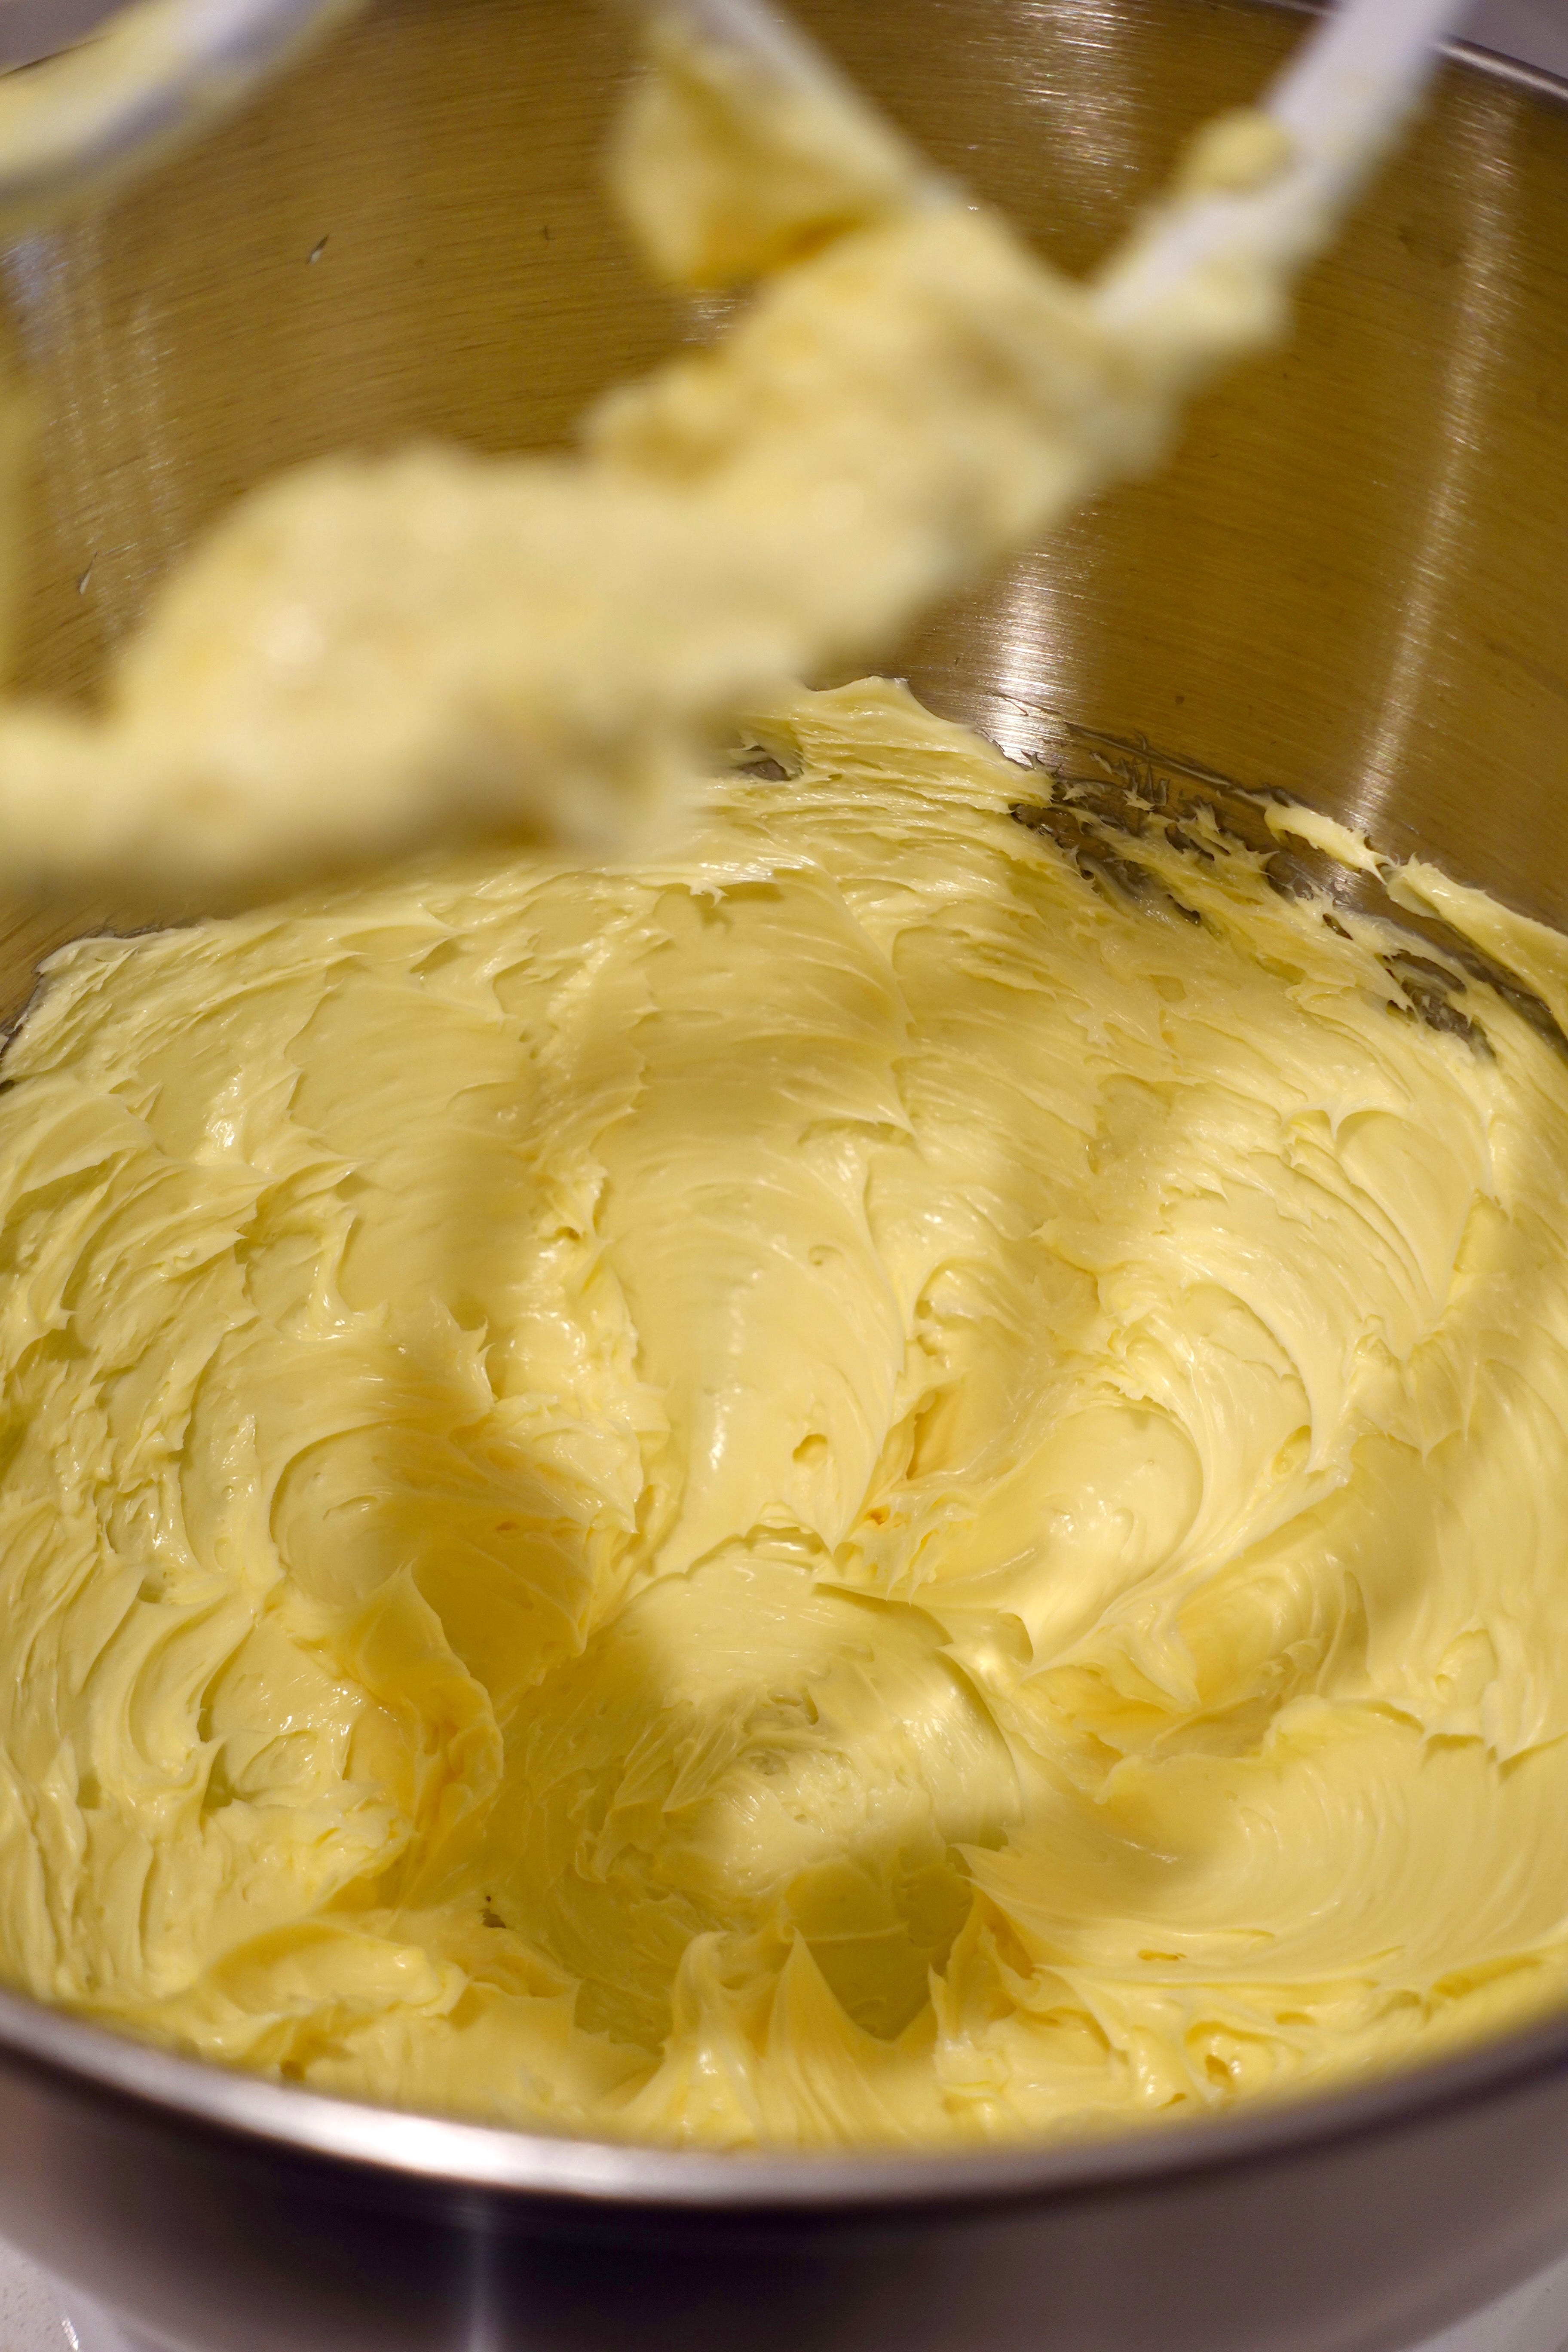
Gradually add the sugar, then the lemon juice: So far so good! Nothing too complicated here.
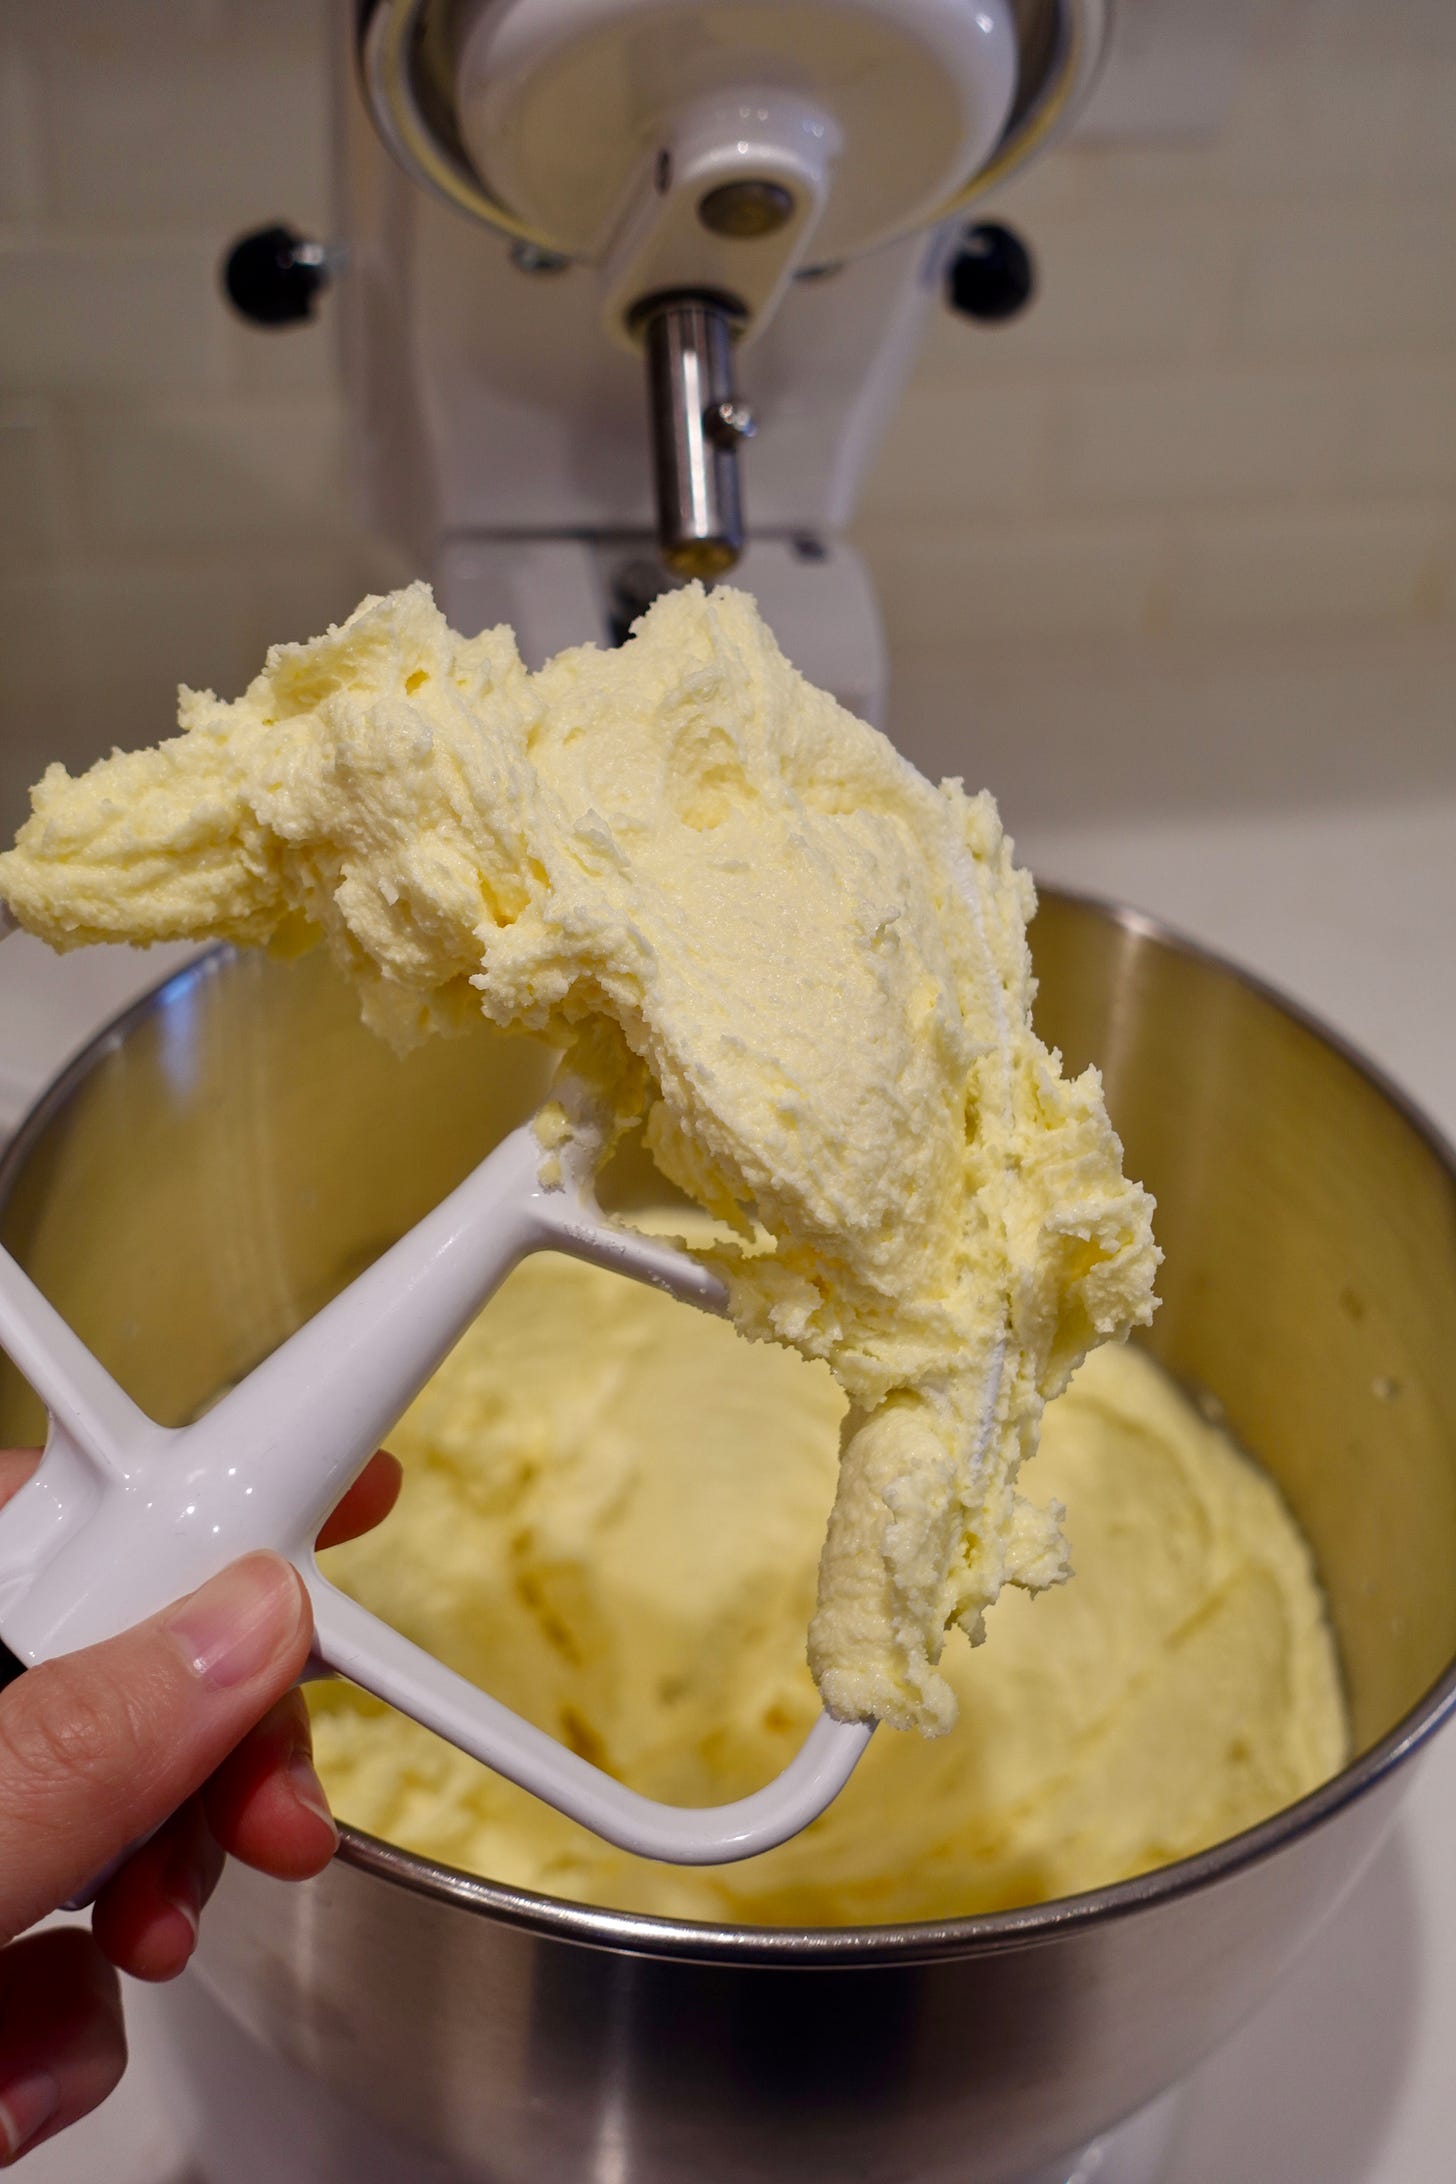
Add the eggs slowly: I used Cho’s method of beating the eggs separately (before adding them into the butter) for better emulsification. But because I was so focused on filming, I streamed the eggs in too fast and the batter separated. Oops!

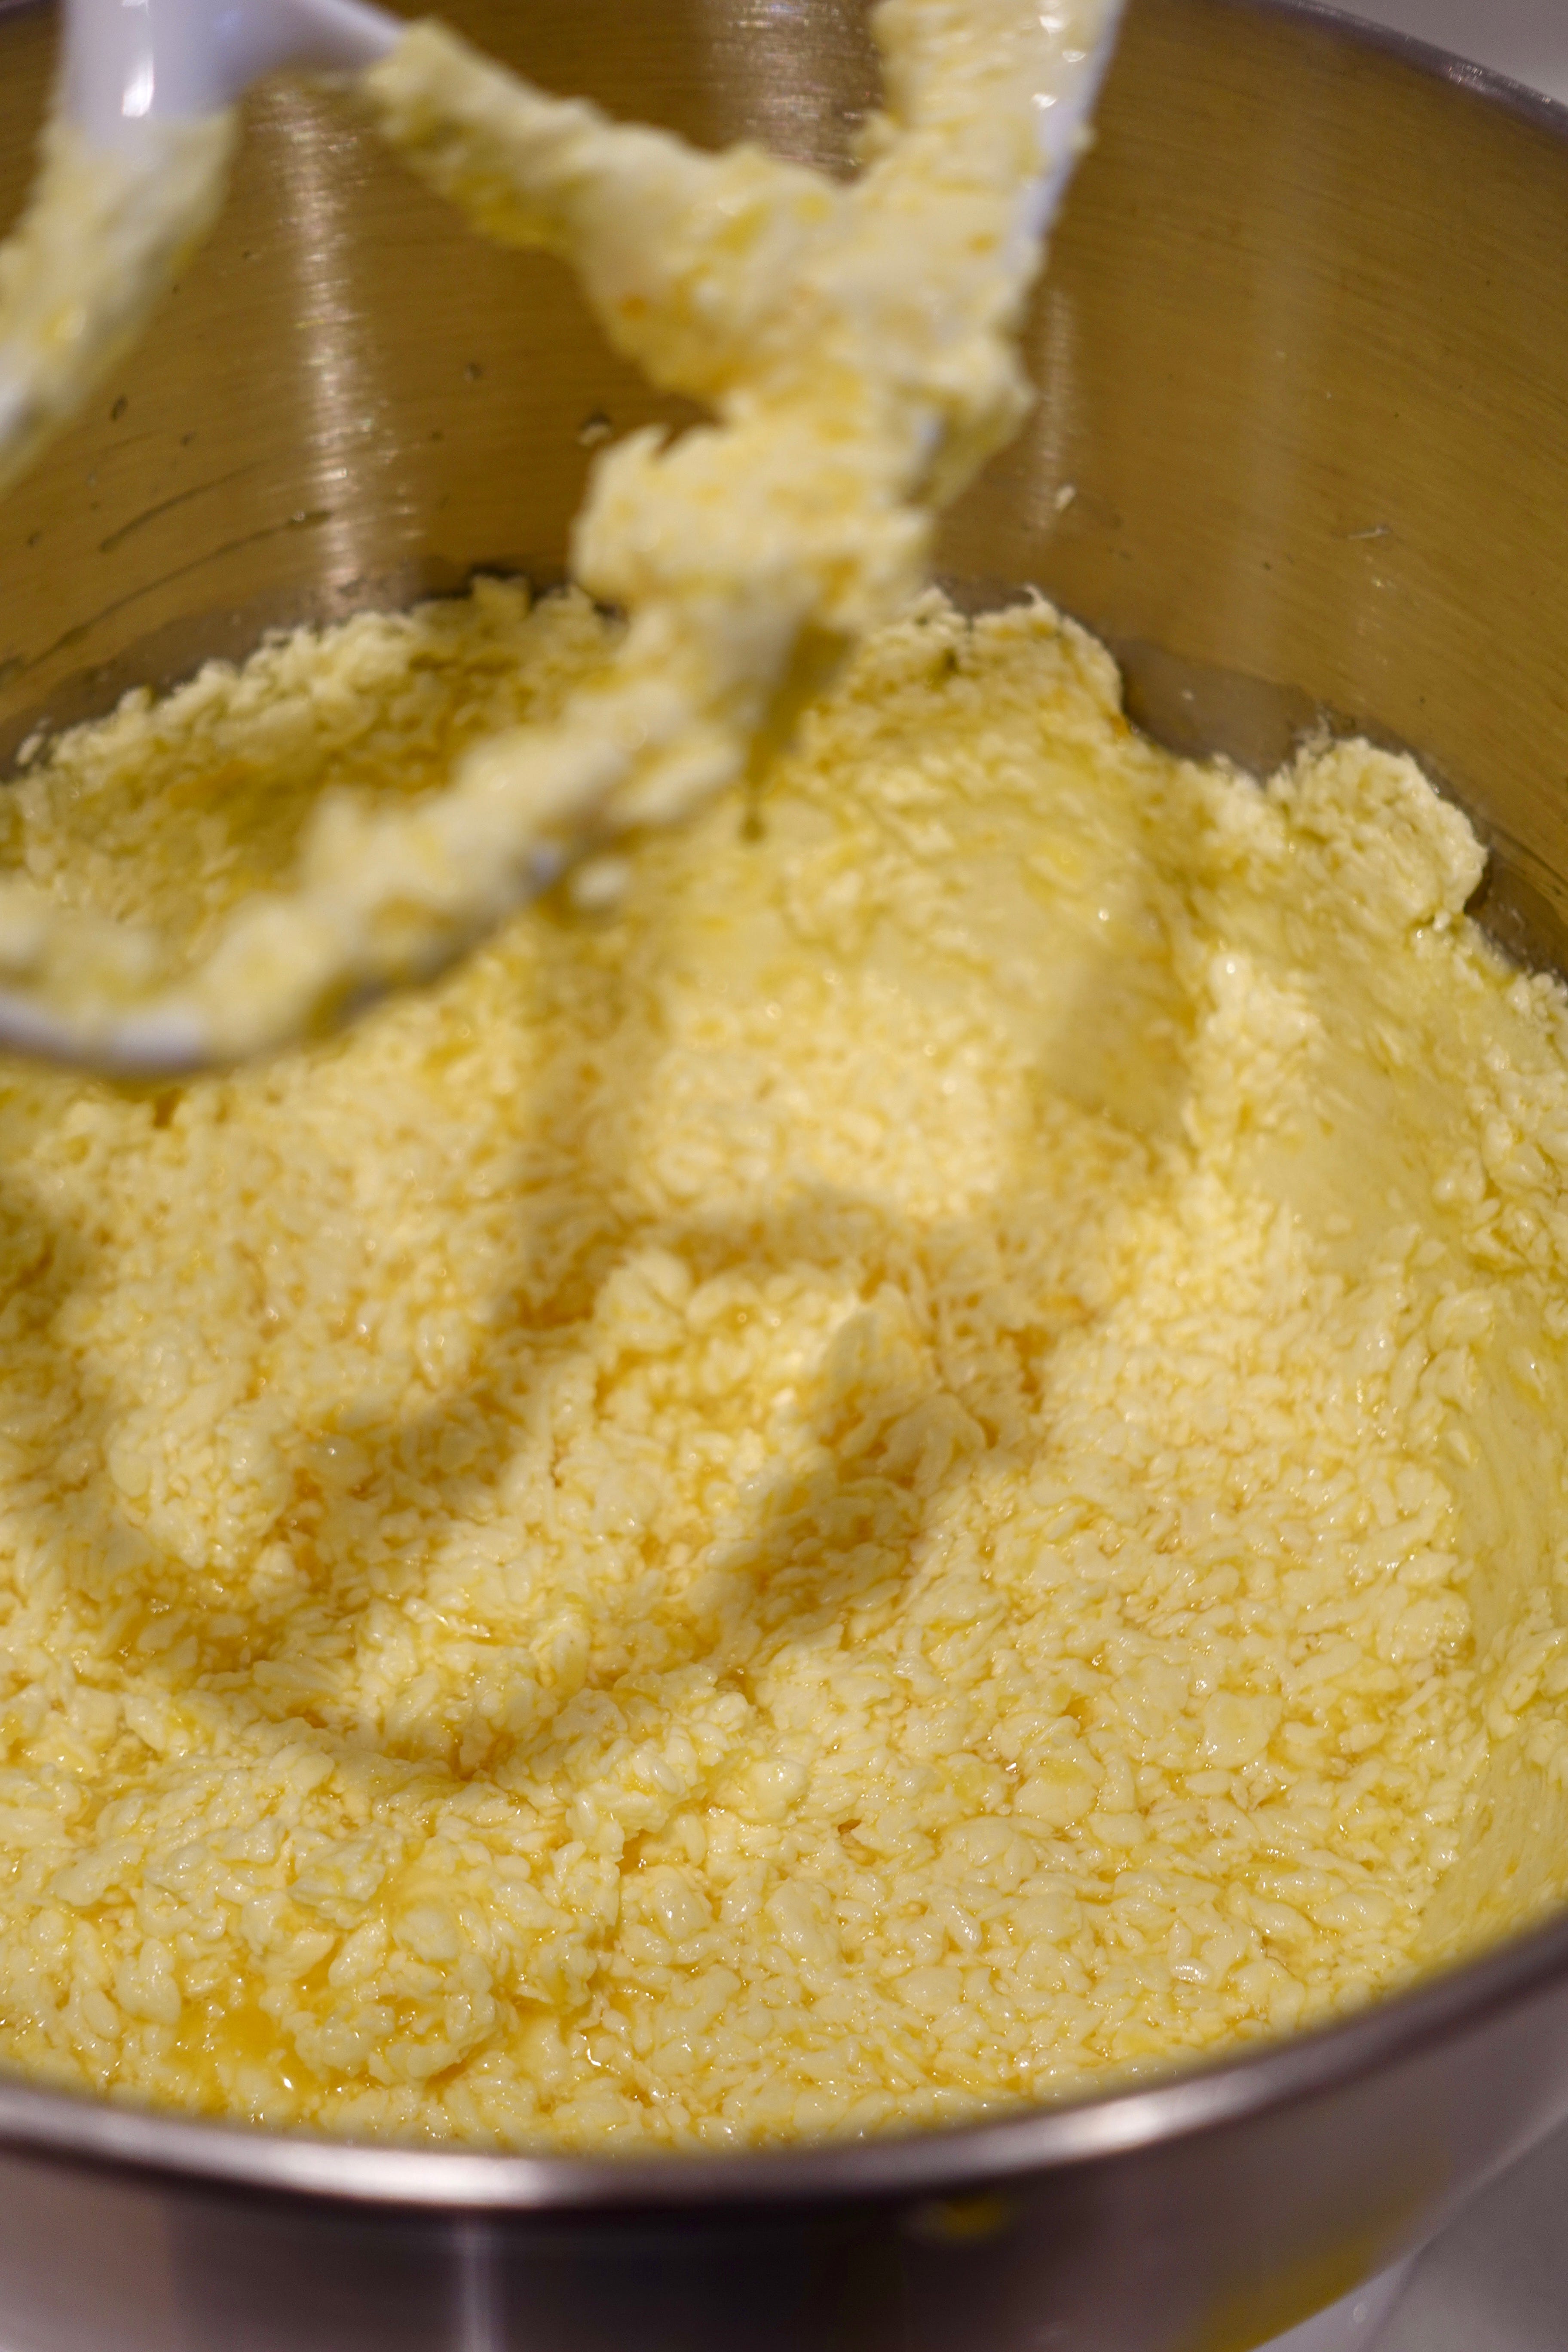
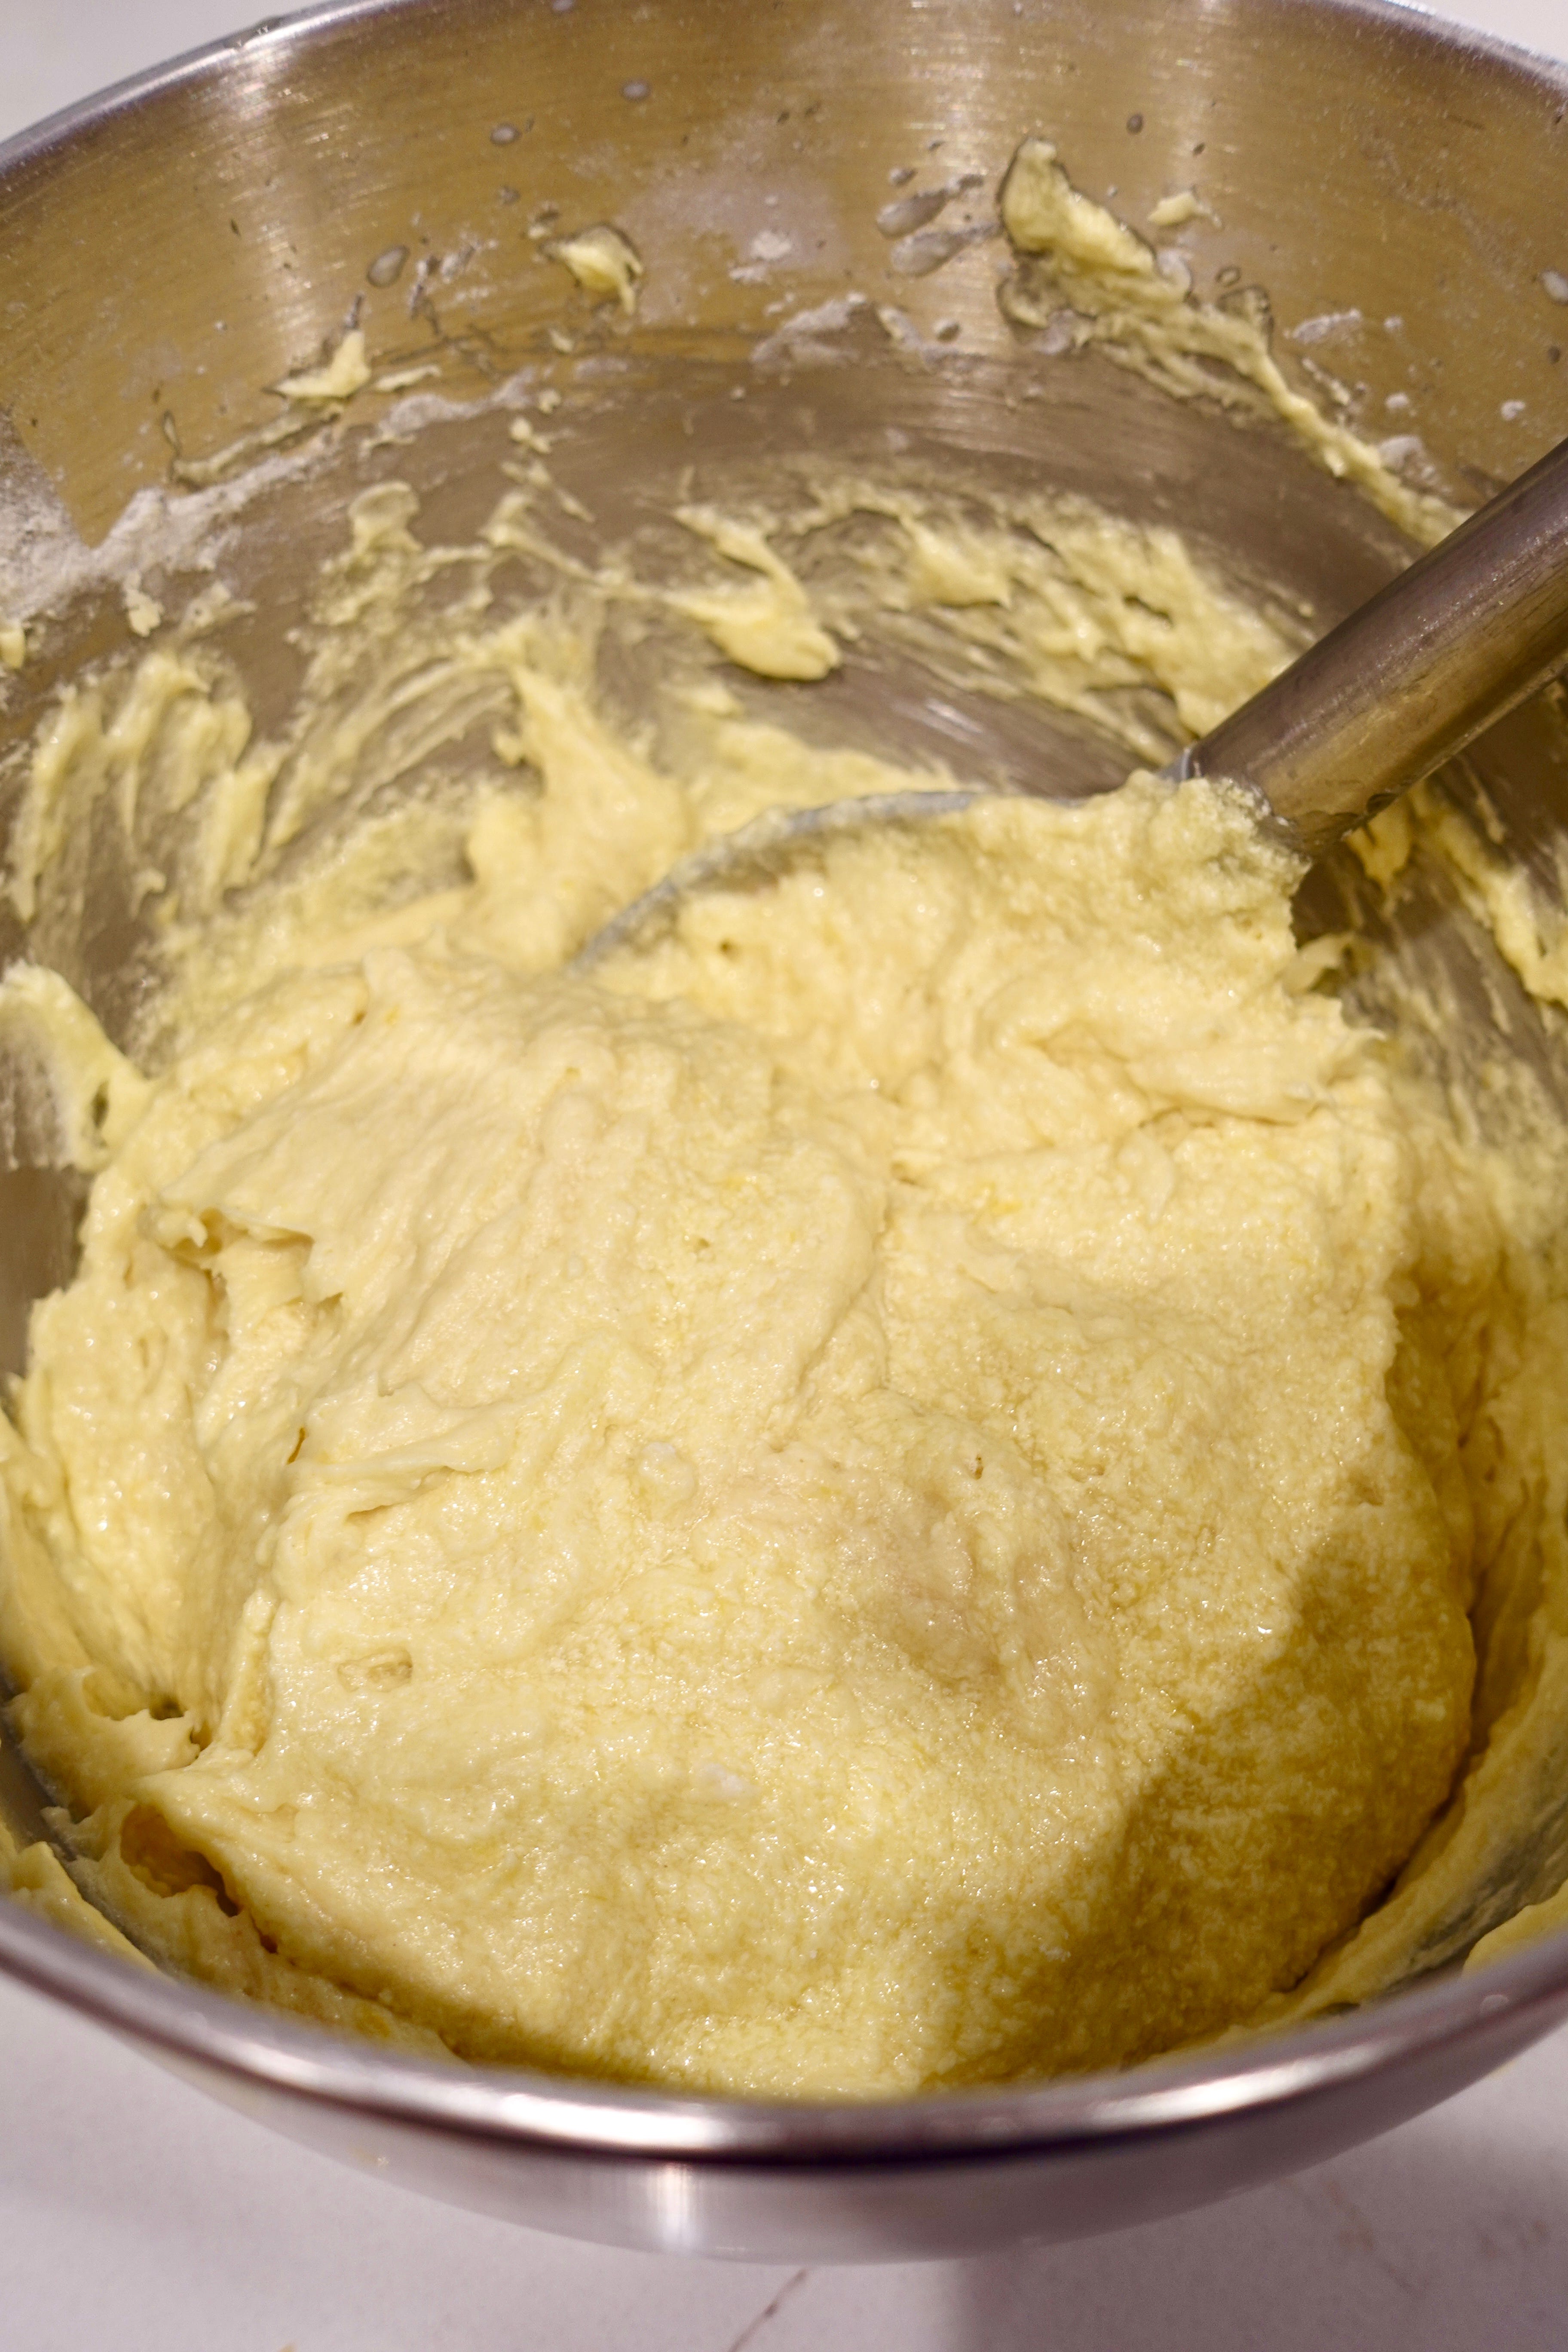
Add flour and milk, alternating between the two: I’ve also seen this method in Claire Saffitz’s recipes. It’s a great way to ensure everything is well-mixed.
At this point, I was so fraught with my separated batter that I didn’t realize until the END that I forgot to add my vanilla extract! It probably didn’t help that it wasn’t written in any of the recipes I was using haha. I folded it in with a spatula to minimize mixing and called it at that.
📝 Quick Notes
Mix the flour as little as possible to prevent gluten formation and a gummy, chewy cake. Using Kanell’s tip, I left some flour “unmixed” at the end and folded the rest with a spatula.
Lemon juice is more than just flavor, it plays a key role by disrupting the “electrostatic” relationship of proteins in flour that connect to make gluten. In the end, the lemon juice’s acidity helps make a soft and tender cake.
Part 2: Prepping the Cube Molds
I spritzed Pam into each cube even though Cho mentions you don’t need it at all. But I didn’t want to take any chances with my first-ever pound cake!
🤓 Did you know? Silicone molds are naturally non-stick and some say that greasing it could potentially wear down the non-stick coating. So grease at your own risk!
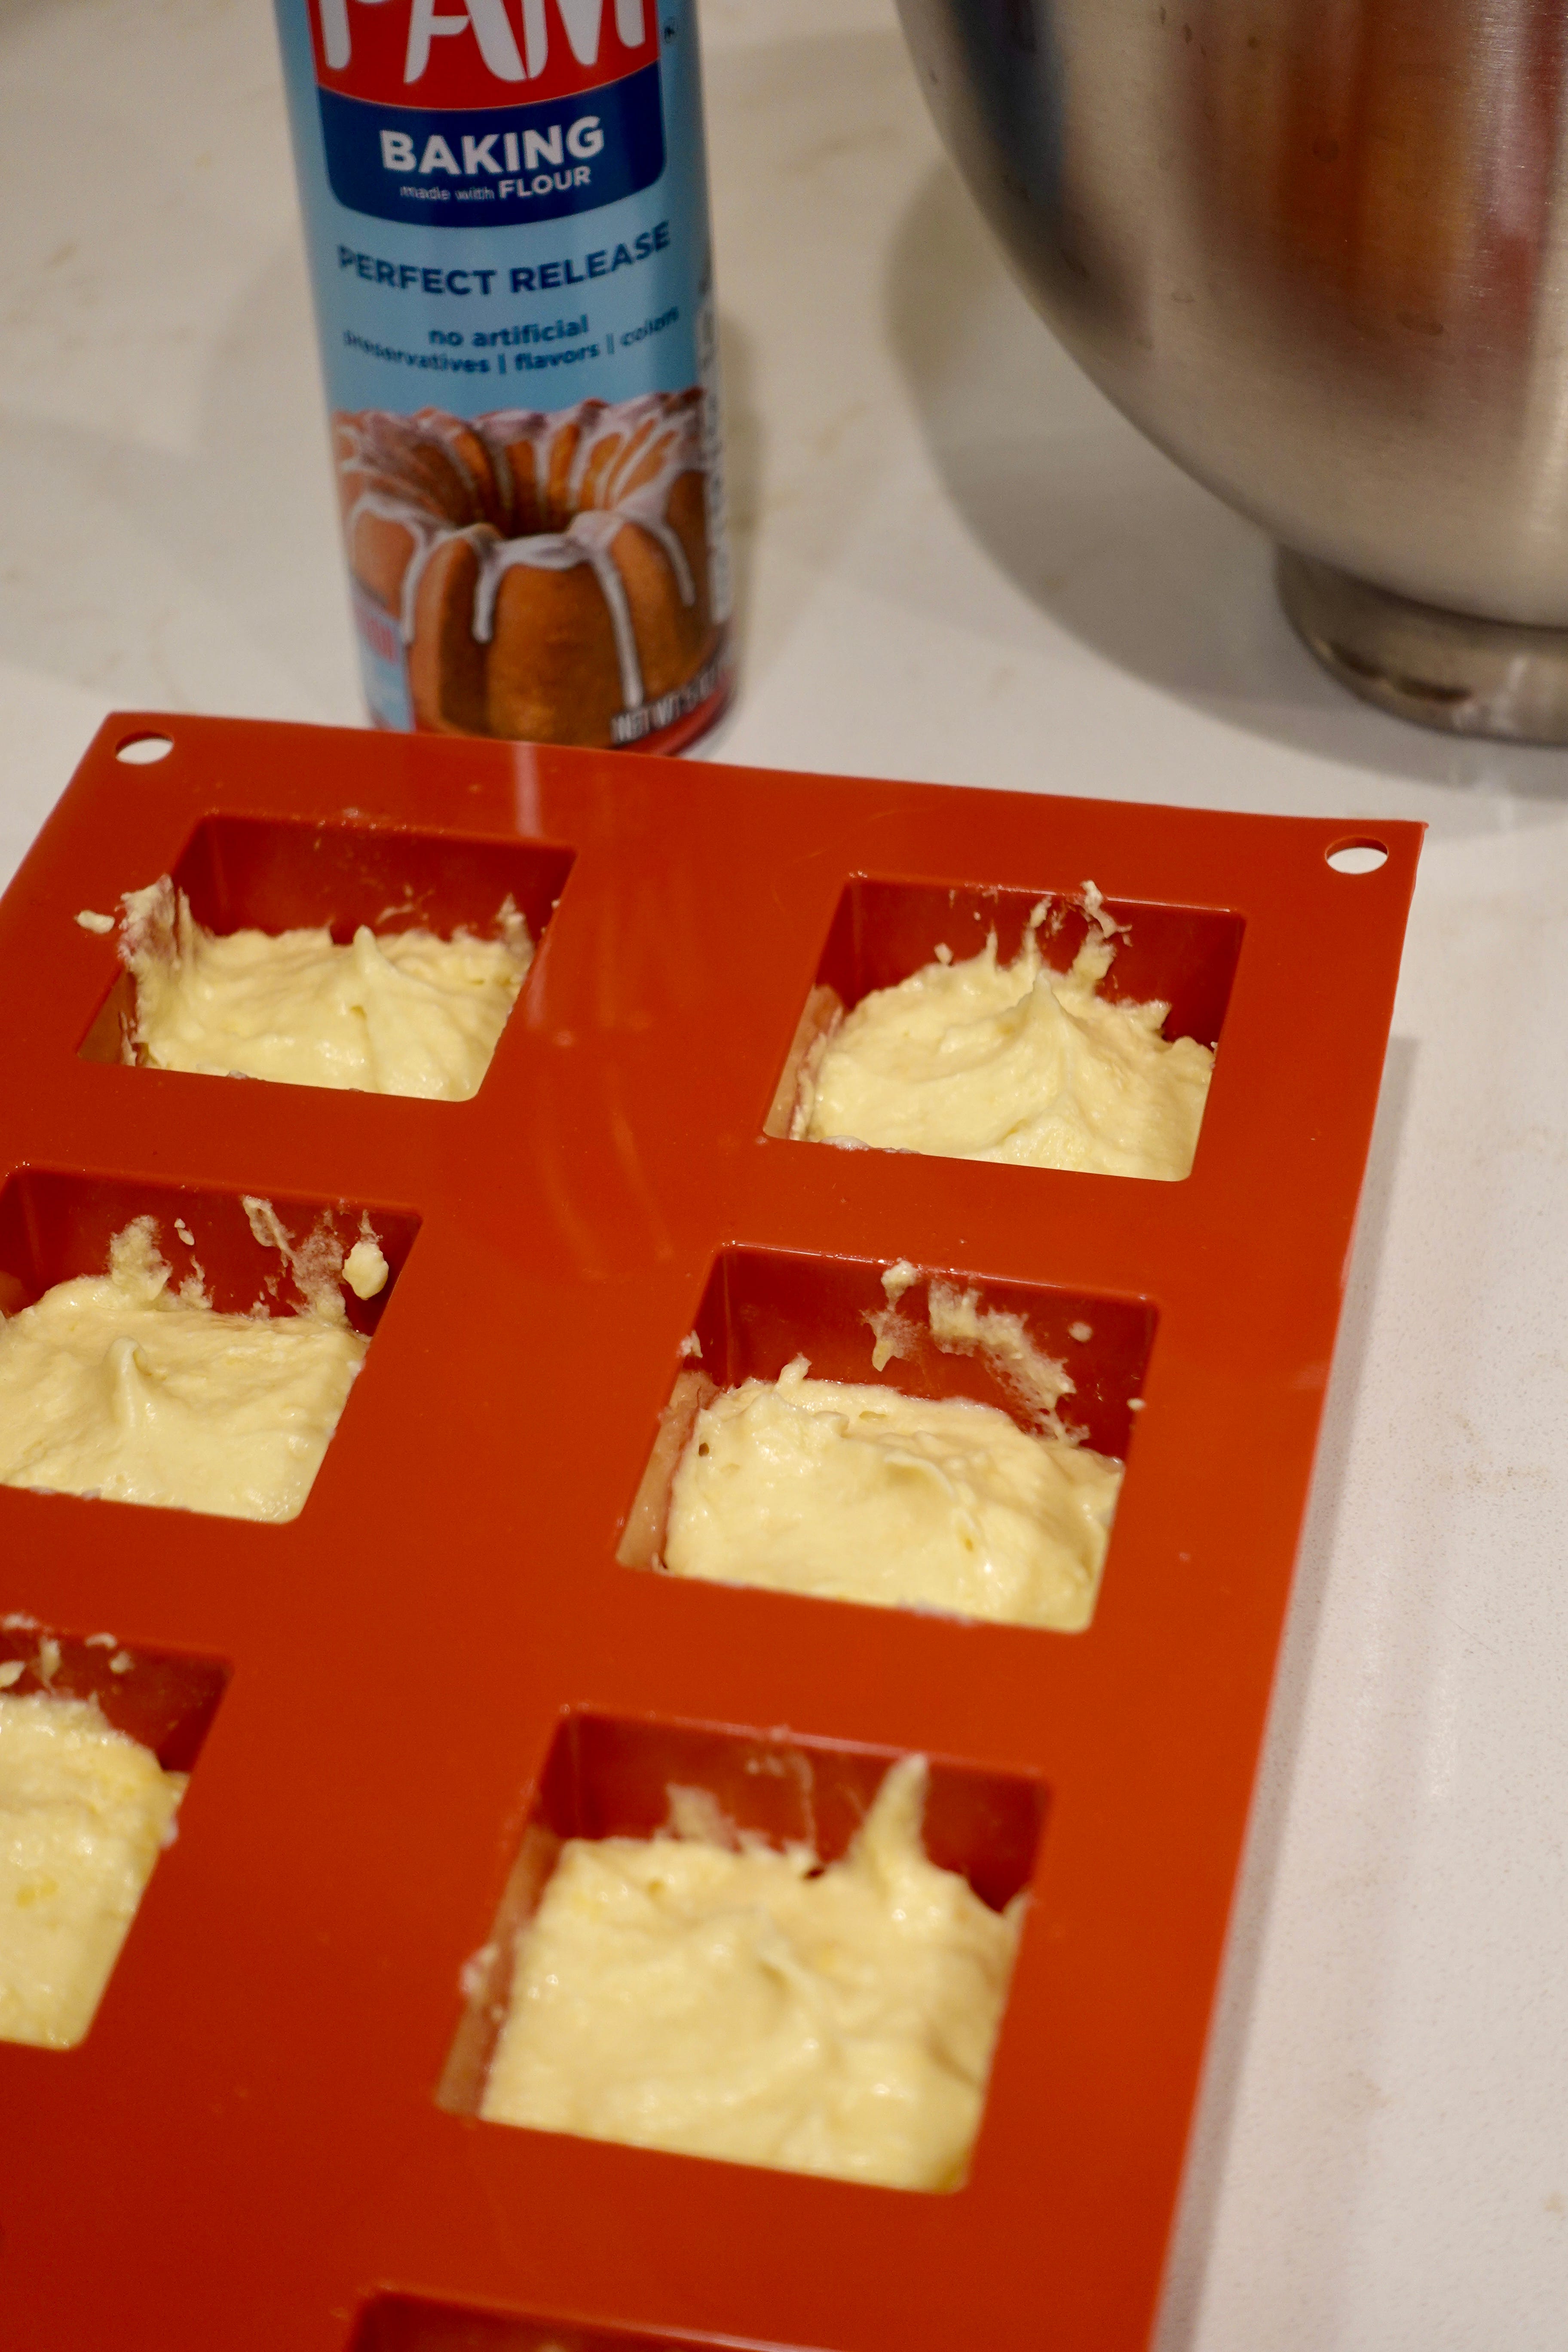
Cho fills the molds with a pastry bag, but I’m still a bit awkward with them, so two small spoons did it for me. I wasn’t sure how much these were going to rise, so I figured 70-80% filled would be good. Plus, I had some leftover batter, so I could test another round to see what works best.
Part 3: Into the Oven
When it came to temperature there were a few options:
Kanell’s recipe recommends 350F
Cho’s recipe calls for 340F
Google results recommend an even lower temp of 325F
Worried about overbaking, I went with 325F for 20 minutes, but the cake tester came out wet. It took a full 30 minutes for the cakes to be done. Once out of the oven, I popped them out of the molds right away. Luckily, they fell out easily with a hard tap of the pan and a light jiggle of the mold.


📝 Quick Notes
Baking sheet support: Place the mold on top of a baking sheet to easily transfer it into the oven and for an even distribution of heat.
My 2nd attempt: For round 2, I filled the molds only 60% of the way and baked at 350F. These came out much more brown on the sides, which I didn’t mind!
Slight slant: I’m still scratching my head about the slightly slanted tops of the cakes, but I think it could be due to several reasons: 1) uneven heat distribution 2) a slanted oven, or 3) big air bubbles. I’ll have to test this one again to figure it out.

Part 4: Glazing the Cubes
After 5 minutes of cooling, I dunked the cubes into simple syrup for even more moisture. I’ve seen lots of bakers spraying down their cakes so I thought why not keep this part of Cho’s recipe?
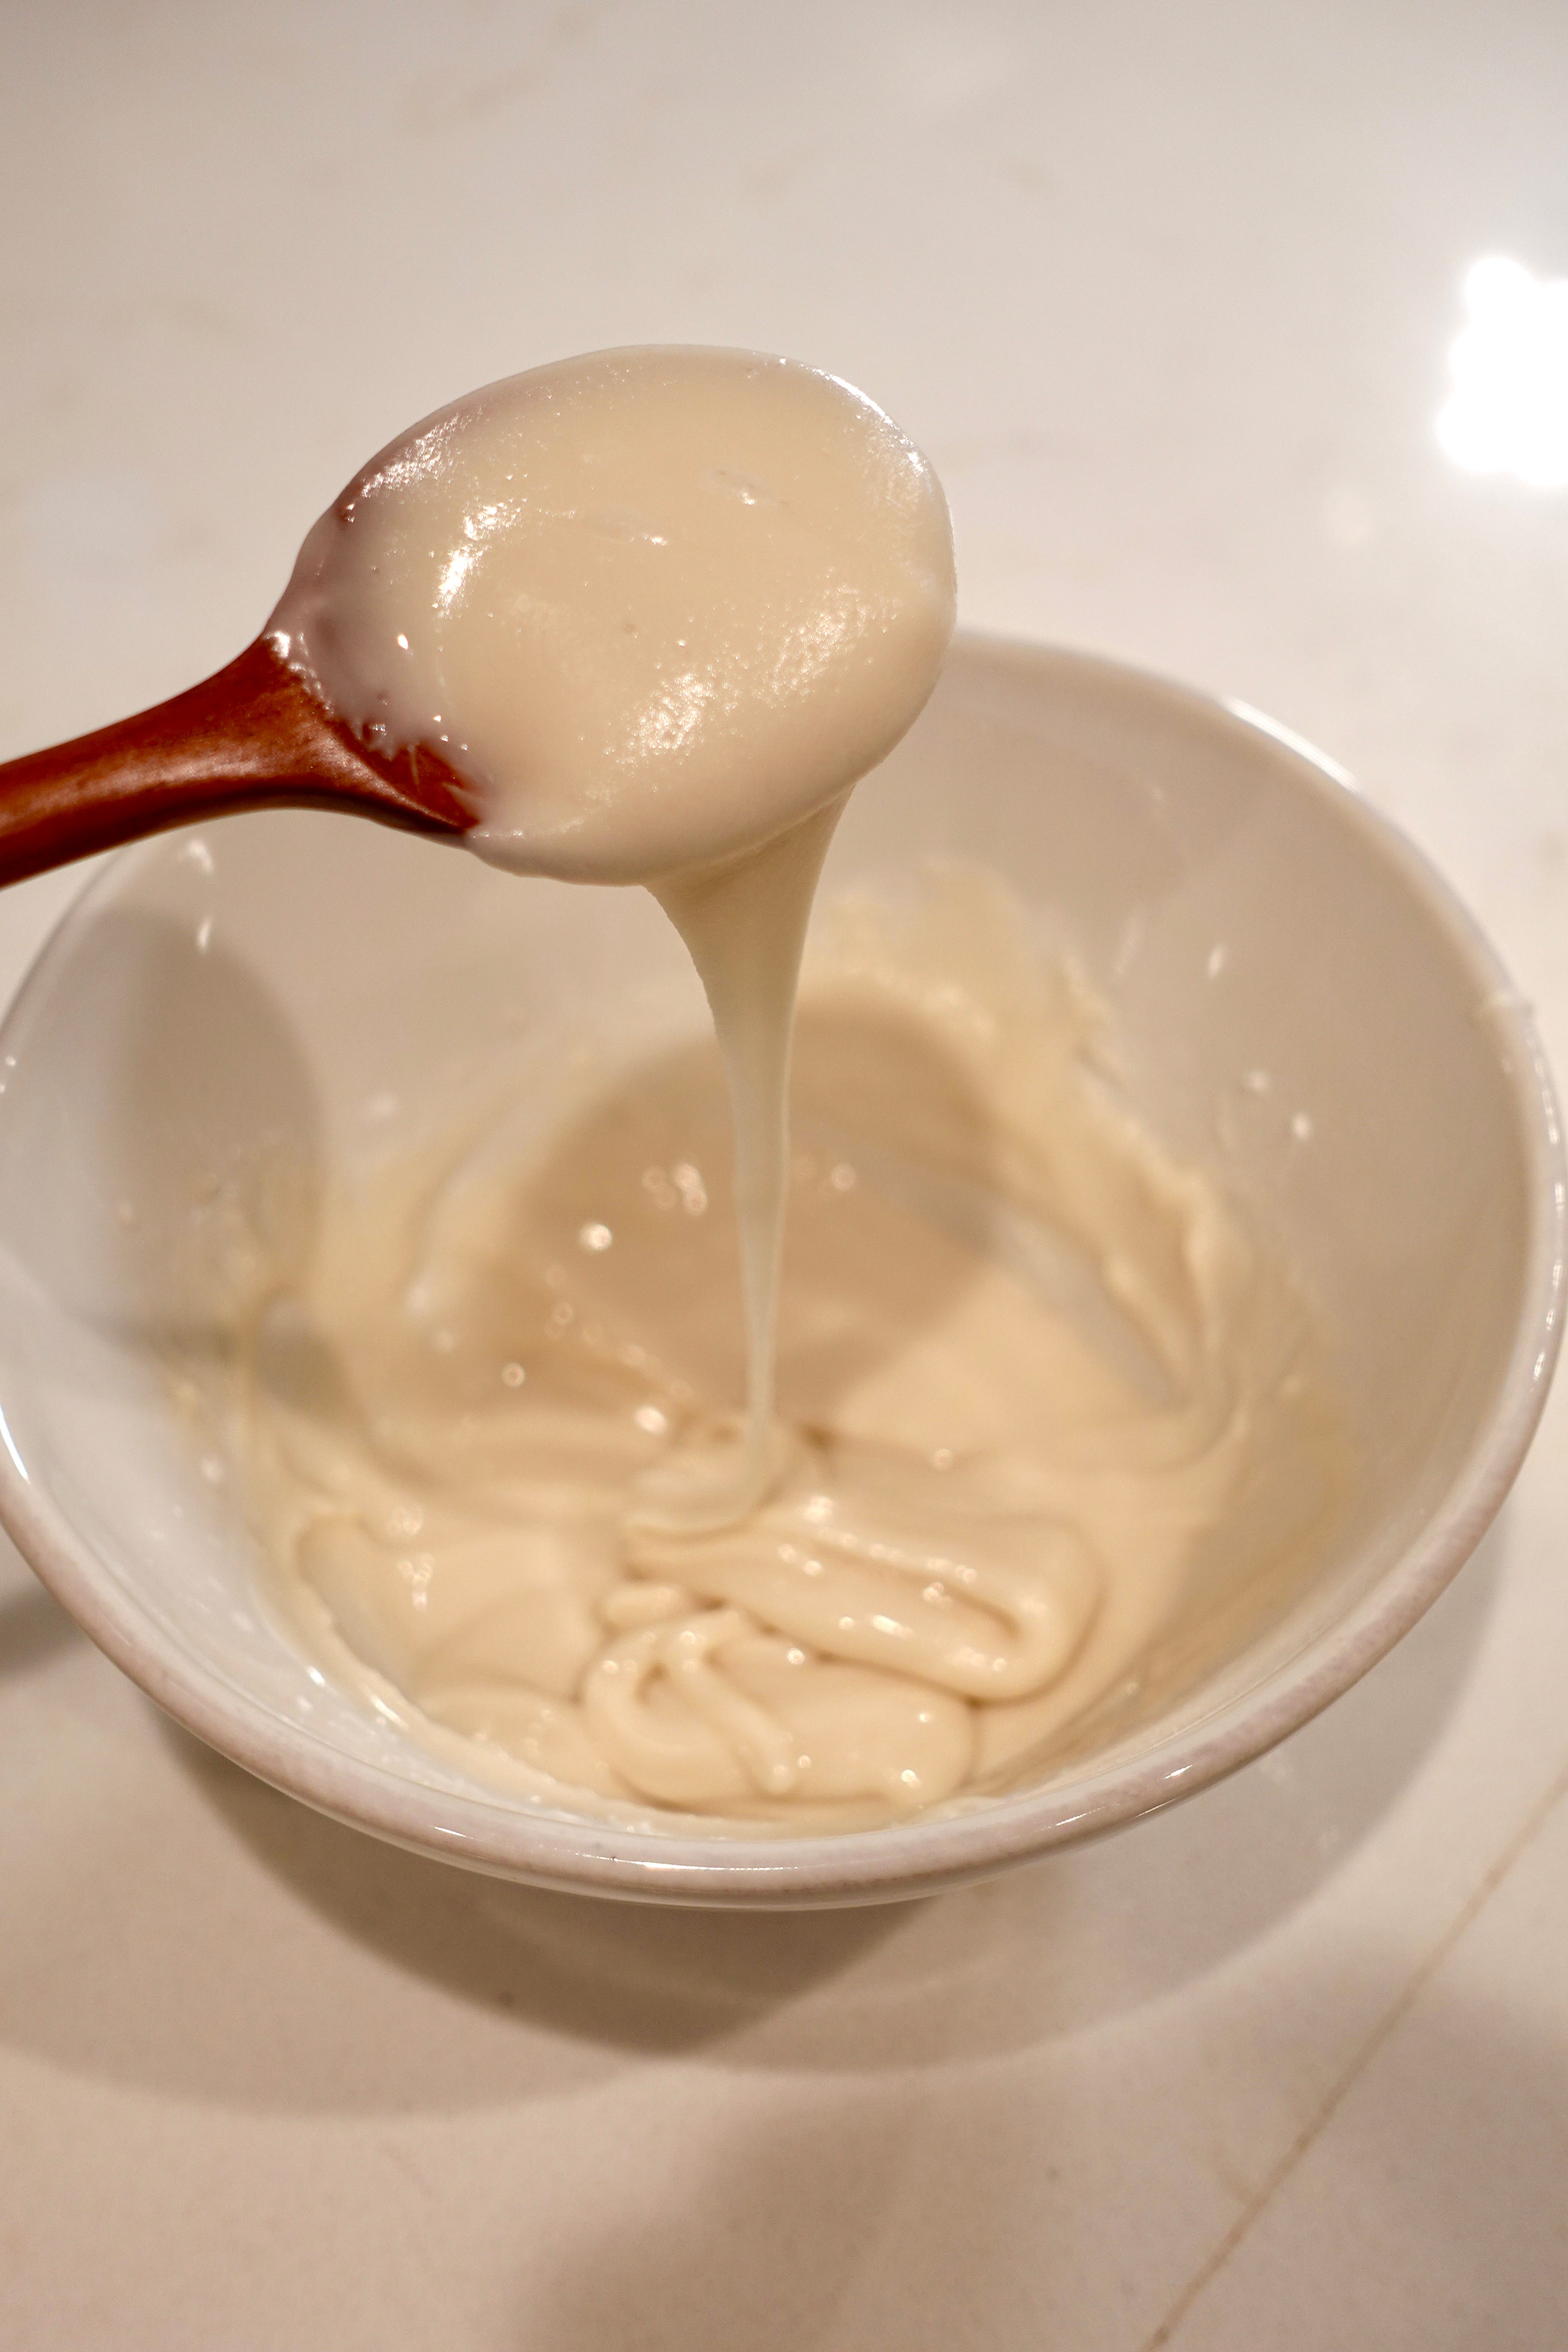
I dolloped glaze onto all the cubes and began to spread it out with the back of a spoon. But by the time I finished my first cube, the glaze had hardened on the rest of them—ah! The more I tried to smooth it out, the more wrinkles formed.
📝 Quick Notes
Glaze hardens fast. To prevent preemptive hardening, dollop and spread glaze onto one cube at a time.
Glaze while the cakes are still warm for more spreadability. If you want to avoid any “spillage” over the edge, I recommend waiting for the cake to cool first.
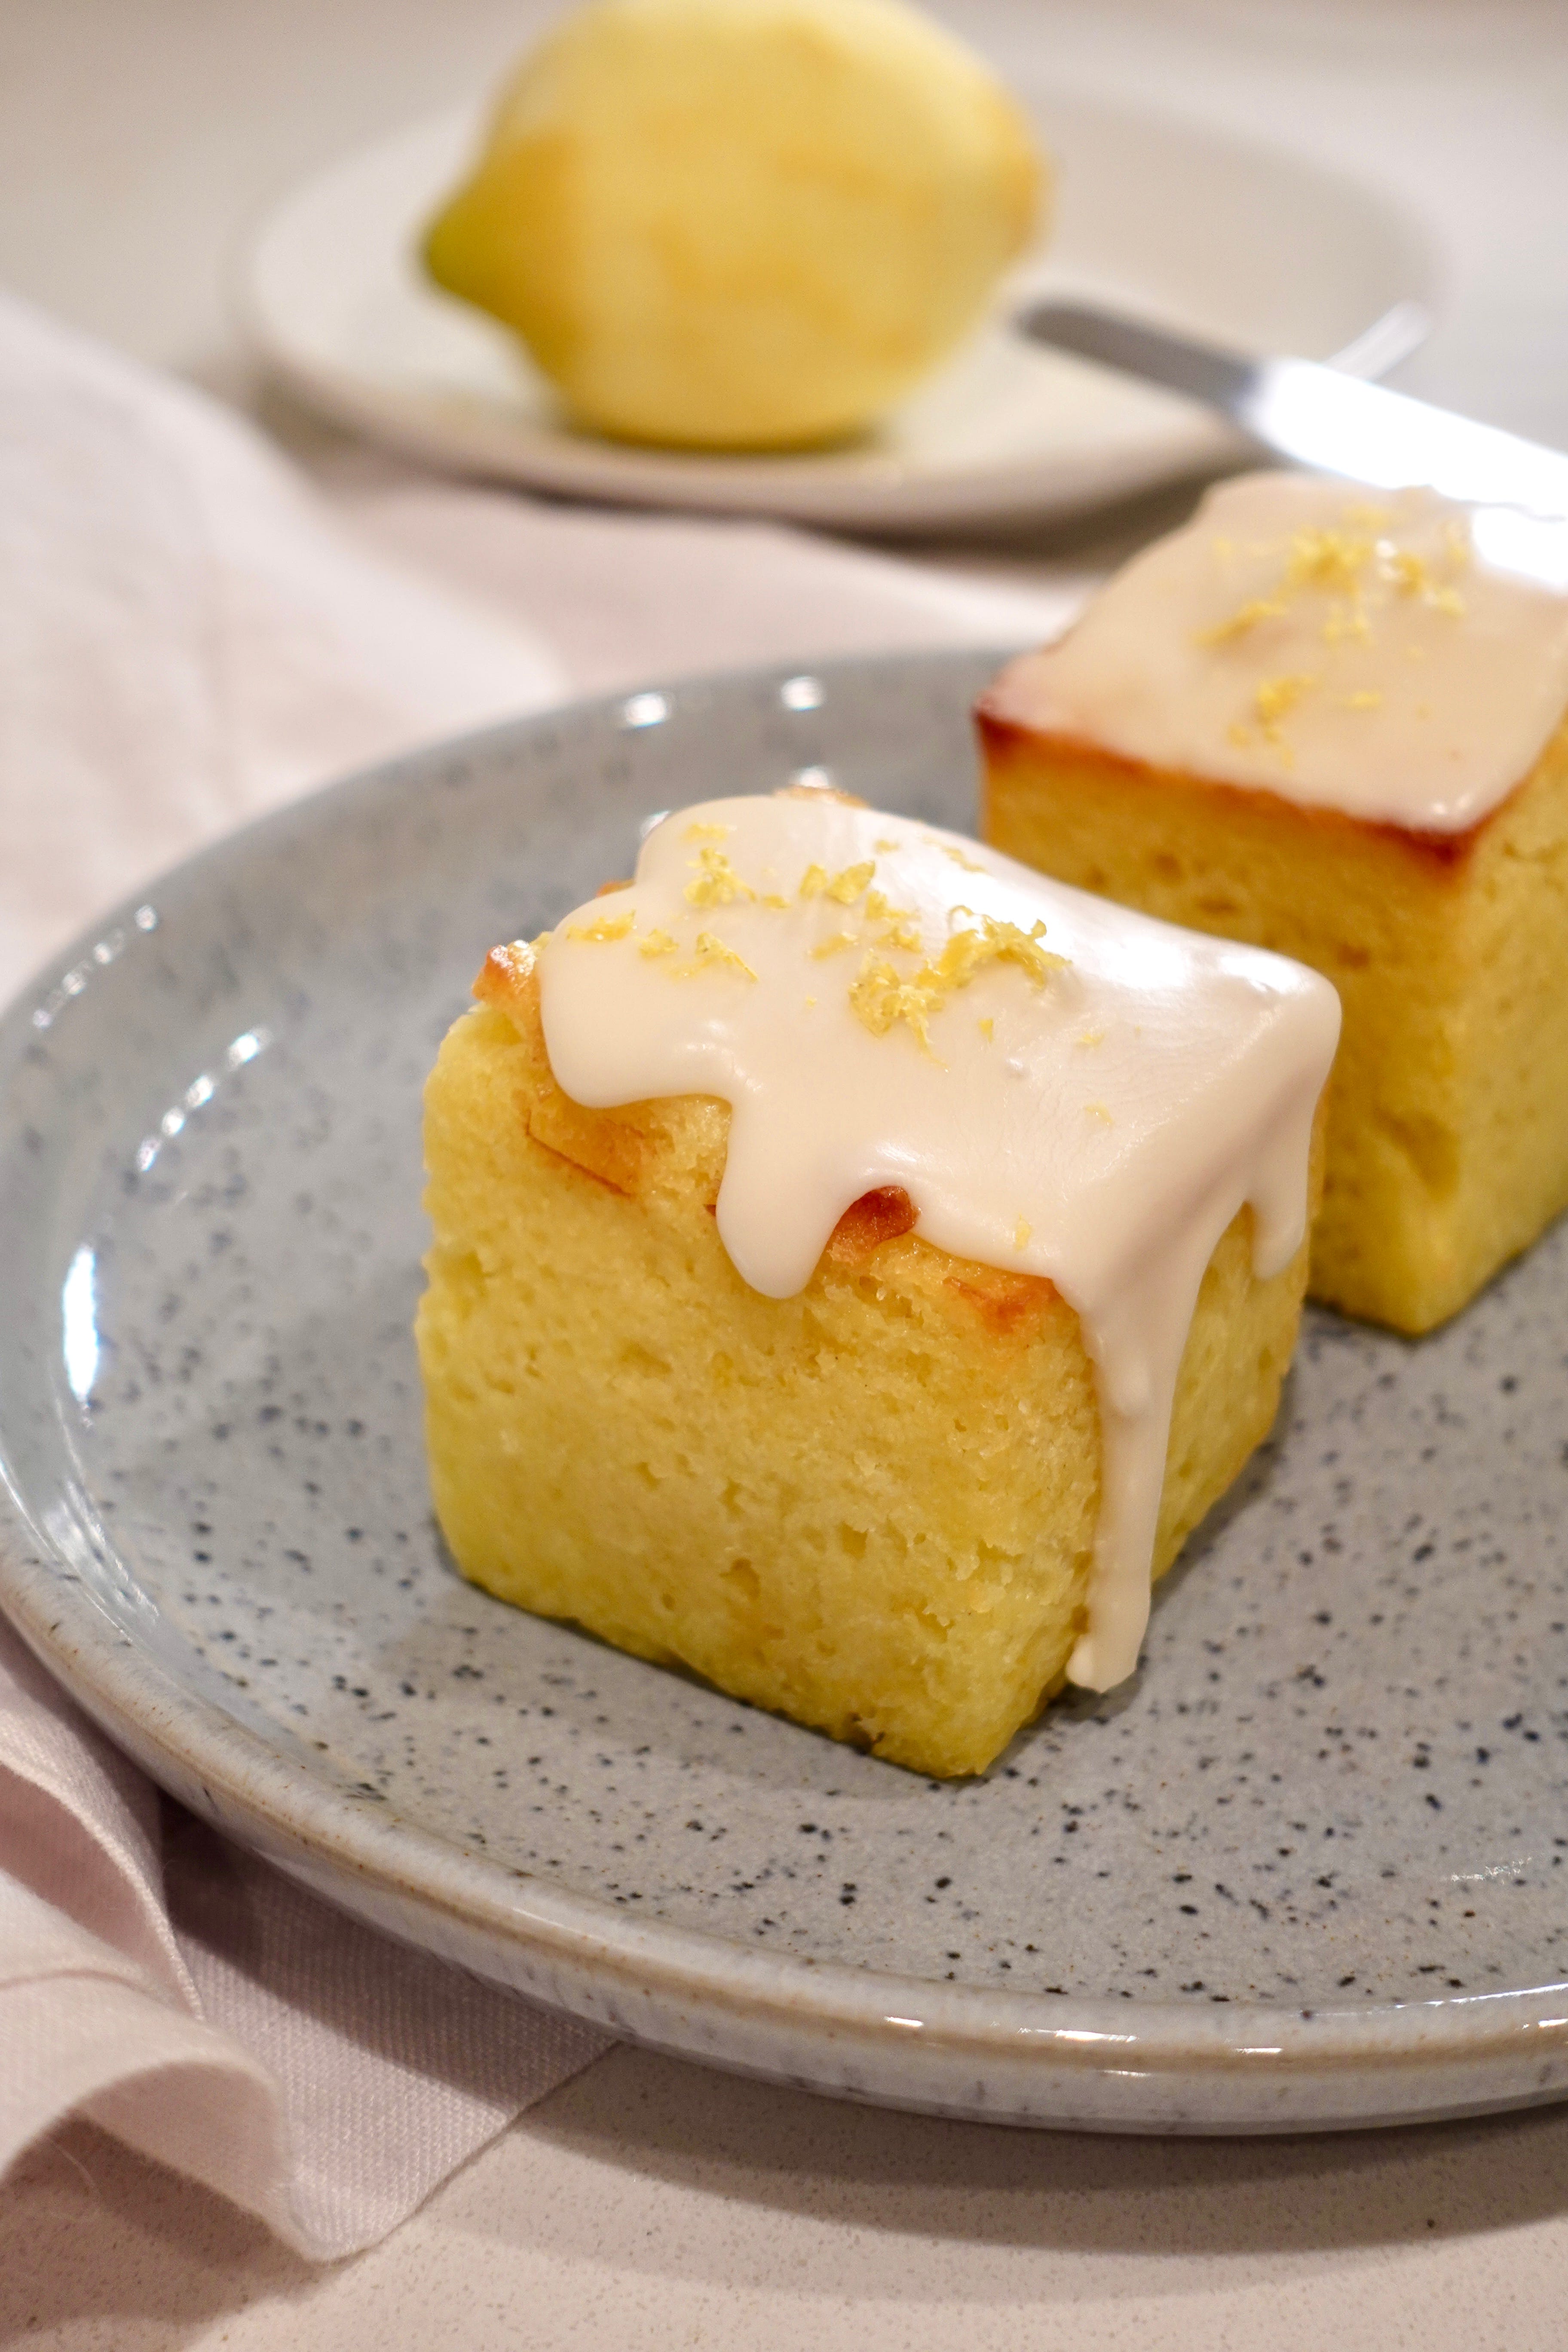
Taste & Texture
This cake is like biting into a sweet, pillowy cloud, and it was much lighter than I expected. I dare say that it was TOO moist since I may have dunked it in the syrup a few seconds too long, but it was delicious!
Also, I was not expecting a sharp zing of lemon from the glaze—so much so, that I made one of those “this is kinda sour” faces at first! It helps that the citrus flavors are a bit subdued in the cake itself, with the vanilla tying everything nicely together.
Final Thoughts
Experimenting forced me to take a step back, understand the recipe, and contemplate how to execute each step. It also gave me permission to do what I felt was right (even against the recipe’s recommendation!).
Embracing my inner Christina Tosi gave me the chance to:
Learn more about the “why” in baking instead of following a recipe.
Get excited about potentially “messing up” because at least my “what if” questions are answered.
Develop my own style and baking sense.
Sometimes, it’s a matter of taking things into your own hands, going beyond what the recipe says, and asking yourself “How does this work?” to learn what baking is all about. It’s that playful spirit that lets you build intuition, lean into the “not-knowing”, and truly embrace the art of it all :)
Warmly,
Anes